Pages

Tuesday, May 17, 2011

Other Projects

THE FLOOR
In our first home (and all our previous apartments) we had linoleum floors in the kitchens and bathrooms.  I always thought that I wanted tile floors because I hated the way the linoleum looked.  So I was excited that this house had tile in the kitchen, entry, and bathrooms.  I like the floor tiles, but there were about 30 of them which were cracked and broken, so when I mopped, those sections always looked dirty.  And I hated the grout. 

Whether this is the color they chose, or if it was just so dirty that mopping, bleaching, scrubbing, and steaming couldn't get it clean, I'm not sure, but it was a disgusting dark brown color.  I felt like no matter how hard I scrubbed, the floor never looked clean.  There were also several sections where the grout had chipped out and there were just big empty spaces between the tiles.  Guess how much fun it was to sweep around that.  I don't have a lot of before pictures of just the floor, but this is a picture we took after St. Patrick's Day to show the leprechaun footprints.  You can at least see the color of the grout in this picture.


SO, I decided to replace the broken tiles (the previous homeowners left 4 cases of extra tiles in the garage) and re-grout the entire floor.  I didn't realize quite how awful this project would be.  It took me a total of 9 months to scrape all the grout from between our nearly 300 12" floor tiles.  Then several days of intensive labor (and Grandpa's help again) to break out all the broken tiles.  Then several more days of intensive labor to set the new tiles and grout the entire floor.  But, I am very pleased with the results!


THE BUILT-IN SHELVES

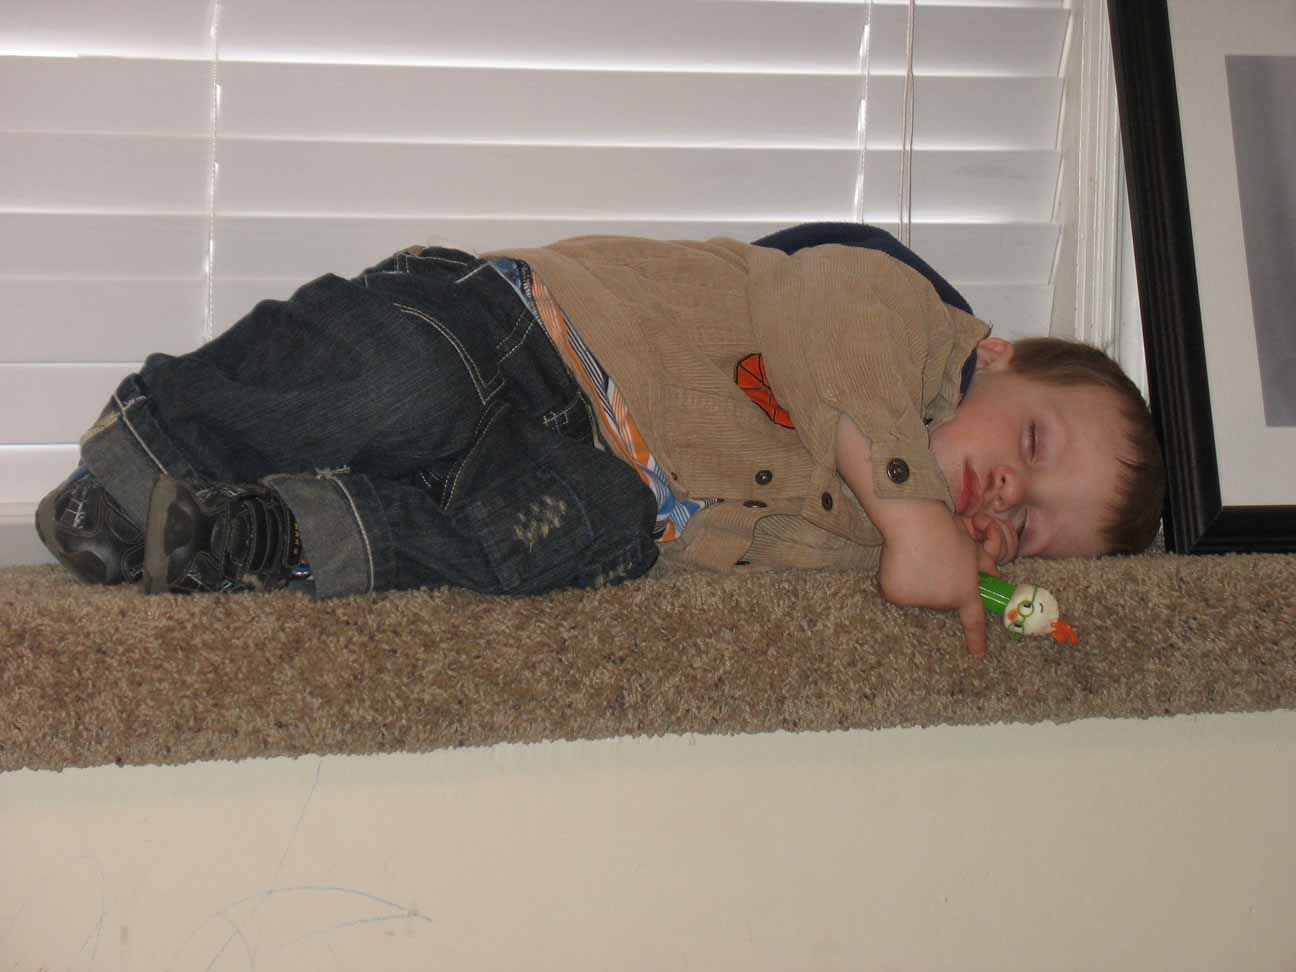
Another strange feature in this house was the window ledge in the TV room.  It extened the length of the room and was covered in carpet.  I always felt like it was just wasted space. Although the kids did like to sleep on it.


So I of course came up with a design plan to make use of the space.   With Dad's help (what would we do without Grandpa?) I built shelves to fill up the space around the 2 windows, creating the perfect place to store our movie collection where the little ones couldn't reach (and subsequently destroy) them.  We even made the shelves adjustable so if the next homeowners want to use them for something else, it will be easy.


RABBIT HUTCH

This project is not a pretty one, but I'm still proud of it and I'll tell you why.  We got a baby bunny for Easter one year and she was so cute and tiny.  We had her in a cage in the house, but she grew so fast and smelled SO bad, that I knew keeping her indoors wasn't going to be an option for much longer.  So I started looking into buying a hutch that we could keep in the yard.  Used hutches were going on KSL for over $200!  I figured I could just build something that would work.  So, using scraps from the garage (leftover wood from the deck, extra flooring from the piano room, unused boards from my shelving projects, etc) I was able to come up with a design and build a rabbit hutch ALL BY MYSELF.  I spent $17 on the cage wire and the hardware (hinges and a latch), and everything else was built from scraps.  So if it looks like a modge-podge of building materials, that's because it is!  And Hazel-Rah the Rabbit LOVES her home outside and has now survived 2 years in my ugly, yet snug hutch.


More House Projects

THE DECK

One of the things I liked about this house when we bought it was the large backyard deck.  We bought the house in winter and everything in the back was covered in snow, but I could at least see the basic shape of it.  It was large enough we could have kept the barbeque grill and a patio set on it.  Unfortunately, once the snow melted, we could see that the entire deck was in pretty sorry shape. The handrails were separating from the deck, several planks were rotting through, and the wood had obviously not been treated to withstand the elements.  The foundations were set into concrete footings, but the beams that were drilled into the footings were cracked and deteriorating. 

We knew the deck would need to be replaced, we just didn't realize quite how quickly...until Justin's leg went right through the wood on his way out to the grill one night.  The whole leg was one giant purple and red bruise and he could barely walk for several weeks afterward.  We were grateful it was his leg and not one of the kids, and realized we couldn't put off the repair any longer.


 Deconstruction of the deck was a lot of work, but a lot of fun at the same time.  We had great weather the entire week and Grandpa was able to come help with the project.


The wood was so rotted on the deck that the boys were able to pry entire boards off with their bare hands, although using the hammers was definitely more fun!


It wasn't long before we had a sizeable pile of rotted wood and the deck quickly disappeared.


We chose to put in a stone patio and build a porch coming off the back of the house.  First we had to do A LOT of digging.  We had to dig out all the old concrete foundations, which was tricky, but then the real trouble started when we had to dig through all the roots from the giant tree which for whatever reason was planted about 8 feet from the back of the house. 


Eventually, we had the area cleared of roots, then rented a compactor to pack the dirt down. Then we ordered several truckloads of patio fill rock, compacted that, leveled everything off and started laying patio stones.


THE FINISHED PRODUCT:
Due to budget constraints, we finished the deck, the center section and one side section of the patio, but the other side section had to be put off, and is going to be finished (hopefully) this summer.  The giant tree limited my project design possilities, but I am extremely pleased with how well the entire project turned out.


House Projects

We have lived in this house for over 4 years now and it seems like we have undertaken at least one major renovation project each year. I was thinking about all the work we've done on the house, and thought it would be fun to document it all.

THE BATHROOM.

This was something I knew would have to be changed when we bought the house. The bathroom was pretty yuck, and I really wanted a jetted tub. This is a before picture. You can see how the drawers in the vanity are broken. There's only one showing in the picture, but all 4 drawers were like that. And the shower was ultra yuck. Yes, those are wheat stocks on the lighter tiles. And this was what it looked like after several days of bleaching and scrubbing to get rid of the black grout between the tiles. We lived with it for as long as I could stand it, but the bathtub was so gross that I didn't even let the kids bathe in it. They learned to take showers instead.
CONSTRUCTION!

We started with the vanity and after we tore it out, we found 2 layers of different linoleum under the tile. Then after we took out the bathtub, we realized the subfloor was completely rotted through. Thankfully, I had inflated my budget sufficiently to cover the expense of replacing not only the flooring, but the entire subfloor as well. We had to re-plumb the entire bathtub and shower to accomodate the larger, jetted tub that we were installing. Thankfully, Dad was a plumber in a former life. Doesn't mean it was easy, but he is a miracle worker and figured out how to make it work. We also had to add a breaker into the fuse box so we could install a heater for the jets. My brother Aaron was the hero of the hour there and managed to figure out all the wiring with input from his electrician brother-in-law.


THE FINISHED PROJECT
After a week of working non-stop, we had a new floor, new vanity, new mirrors, new lighting, new jetted tub, new shower surround, new paint, new medicine cabinets, AND we managed to come out $16.00 below my inflated budget! I LOVE MY BATHROOM!